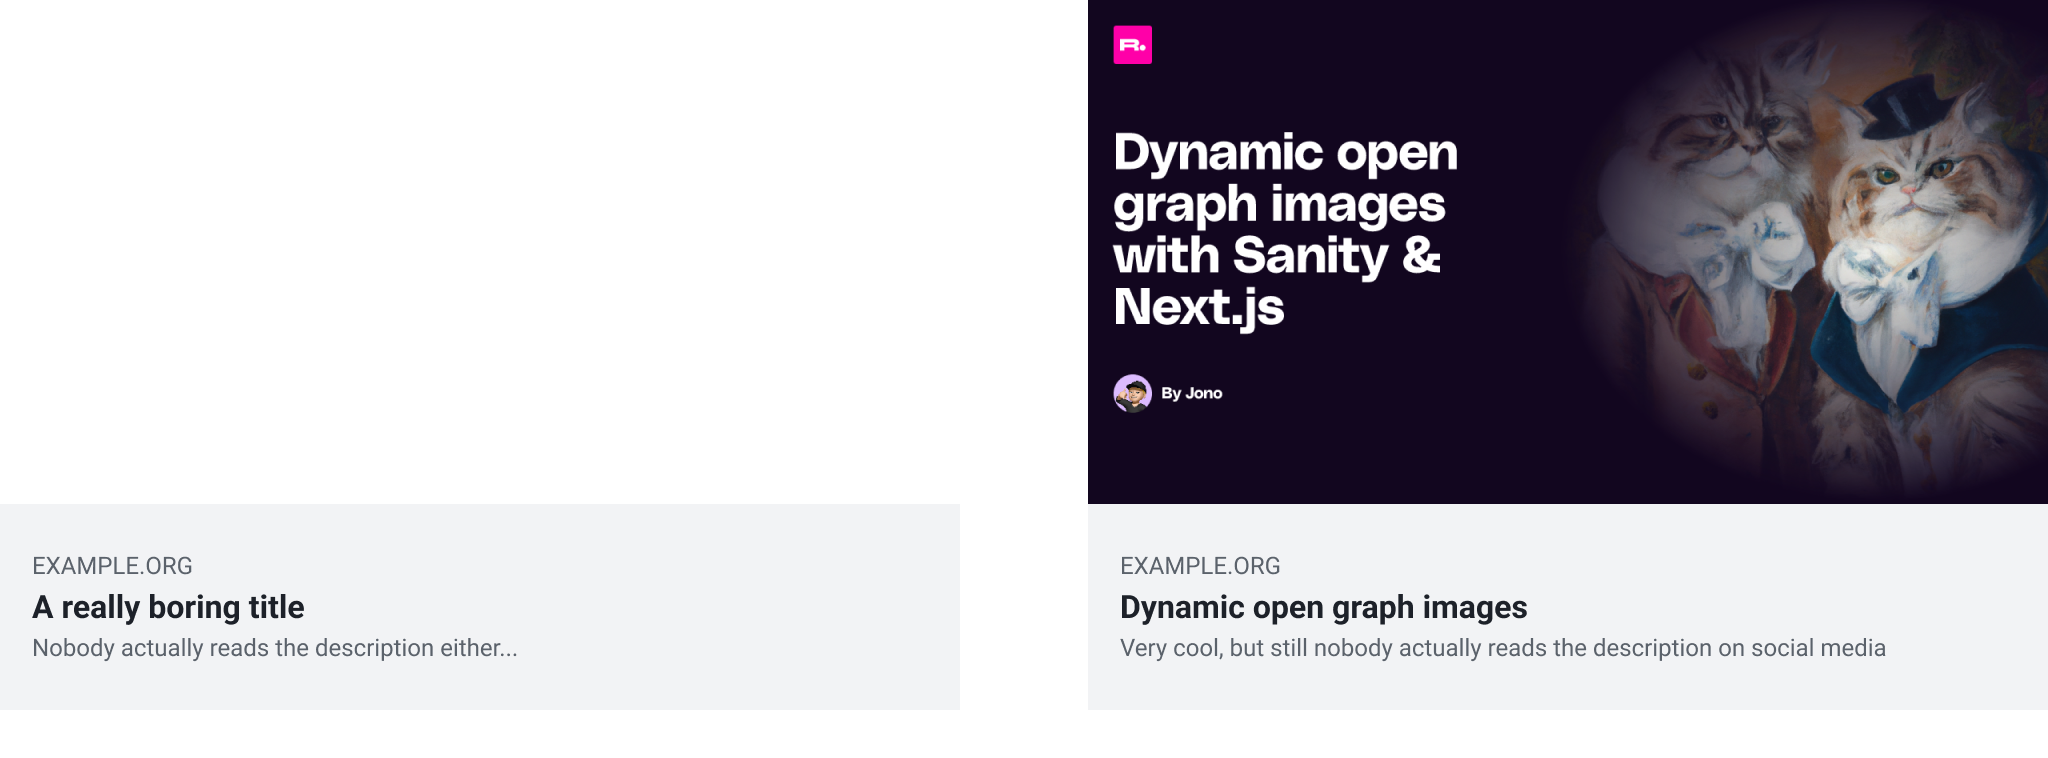
The aesthetic of a website on social networking can be enhanced by using Open Graph Images. it is possible to manage how a website is portrayed when it’s shared on social networking platforms by defining these images using a collection of meta tags on the head part of the page.

It is easy to notice the advantages of using Open Graph images when comparing a website with defined Open Graph images with one without. When shared on social media, the website with an Open Graph image will display an aesthetically pleasing and representational image, but the website without an Open Graph image will either display no image or a random image from the website's content. The user's opinion of the website and the likelihood to click on the shared link may be considerably impacted by this.
Setting up open graph image/social card generation on the next app
To create social cards there’s a plugin provided by vercel.
@vercel/og
// to install this on a next js project
// npm i @vercel/og
For Next.js implementations, make sure you are using Next.js v12.2.3 or newer
Create an API endpoint by adding og.tsx under /pages/api. Then paste the following code:
import { ImageResponse } from '@vercel/og';

export default function () {
  return new ImageResponse(
    (
      <div
        style={{
          fontSize: 128,
          background: 'white',
          width: '100%',
          height: '100%',
          display: 'flex',
          textAlign: 'center',
          alignItems: 'center',
          justifyContent: 'center',
        }}
      >
        Hello world!
      </div>
    ),
    {
      width: 1200,
      height: 600,
    },
  );
}
Then, based on the Open Graph Protocol (https://ogp.me/#metadata), create the web content for your social media post as follows:
- Create a <meta> tag inside the <head> of the webpage
- Add the property attribute with value og:image to the <meta> tag
- Add the content attribute with value as the absolute path of the /api/og endpoint to the <meta> tag
<head>
  <title>Hello world</title>
  <meta
    property="og:image"
    content="%absoultepath%/api/og" // absolute path of the app after deployment.
  />
</head>
Adding a dynamic touch to it.
To make the Open Graph image generation dynamic, developers can pass data into the API endpoint as query parameters and generate images based on that data. This can be done by creating a
<meta> tag in the <head> of the webpage and setting the property attribute to og:image and the content attribute to the absolute path of the /api/og endpoint, along with any desired query parameters.
export default function Page({title, image}) {
  const searchParams = new URLSearchParams({
    title,
    image, // link to image
  })
  const imageUrl = '...absoluteaddress/api/og?' + searchParams.toString()
  return (
    <html>
    <head>
      <title>The post's title</title>
      <meta property="og:image" content={imageUrl} />
    </head>
    ...
  )
}
and on the og.tsx page
import {ImageResponse} from '@vercel/og'
import {NextRequest} from 'next/server'

export default function handler(req: NextRequest) {
  try {
    const {searchParams} = new URL(req.url)

    // ?title=<title>
    const title = searchParams.get('title') ?? 'default Title'
    // ?image=<image>
    const image = searchParams.get('image') ?? 'https://linktodefaultimage'

    return new ImageResponse(
      (
        <div
          style={{
            backgroundColor: 'black',
            backgroundSize: '150px 150px',
            height: '100%',
            width: '100%',
            display: 'flex',
            textAlign: 'center',
            alignItems: 'center',
            justifyContent: 'center',
            flexDirection: 'column',
            flexWrap: 'nowrap',
          }}
        >
          <div
            style={{
              display: 'flex',
              alignItems: 'center',
              justifyContent: 'center',
              justifyItems: 'center',
            }}
          >
            <img alt="image:alt" height={200} src={image} style={{margin: '0 30px'}} width={232} />
          </div>
          <div
            style={{
              fontSize: 60,
              fontStyle: 'normal',
              letterSpacing: '-0.025em',
              color: 'white',
              marginTop: 30,
              padding: '0 120px',
              lineHeight: 1.4,
              whiteSpace: 'pre-wrap',
            }}
          >
            {title}
          </div>
        </div>
      ),
      {
        width: 1200,
        height: 630,
      }
    )
  } catch (e: any) {
    console.log(`${e.message}`)
    return new Response(`Failed to generate the image`, {
      status: 500,
    })
  }
}
this way you can customize the og image per page.
Conclusion
In this article, we have examined how to use Vercel and Next.js to generate and output Open Graph images for social media sharing. We have seen how to set up a Next.js app with Vercel and use the @vercel/og plugin to generate Open Graph images. We have also explored advanced techniques for customising the Open Graph image functionality of a Next.js app with Vercel, such as generating dynamic images.
I hope this article has been helpful! If you have any questions or would like to learn more about using Vercel and Next.js for Open Graph images, be sure to check out the Next.js documentation and the Vercel documentation on og images
Thinking about generating an image for Sanity's blog?
Here's a quick tip, it says the image is 1200x700px - it's actually closer to 1200x758px if you want it to look identical to the Roboto Studio open graph.


